This page is a little peak into the building blocks that makes me who I am. These are the fun projects that fuel my creativity. Most of my projects are inspired by personal interests or solving problems around me. I like to think of myself as a garage “MacGyver”. I try to use common materials I have collected through the years and focus on building things on a budget.
Living in the S.F. Bay Area riding a bike can be a great way to travel. For about two years I rode to and from work and was a really great way to wind down. With the new electric bicycles hitting the market this re-ignited my interest in powered transportation. With the new electric bikes costing $2K - $5K, it was way out of budget for a me but I knew there was something I could think of at a fraction of the cost . I wanted to create something economical, with parts I had, and make it look cool.
I had an old vintage Schwinn bicycle frame and found 49cc motor kit on craigslist for 300 bucks. It was suppose to be a simple bolt on kit but you really think I could end there. Of course not, I had to make it look cool, make it my own, make it look like something build to travel. I was inspired by the café racer style bikes. Stripped of everything not necessary and exposed machinery. Nothing was hidden and there was such a romance around it.
I started with some ideation sketches. I wanted something with curves, hips, something with emotion. I modeled out the design and planned how the components will fit together. I wish I took more photos of the build process but I tend to get excited and forget. I molded the main faring from fiberglass and painted the entire chassis with automotive paint and two part clear. All the brackets, exhausts, and components were hand made.
I grew up in the 90’s watching rally cross shouting at the TV as cars flew over humps at ridiculous speeds and sliding around corners throwing dirt into the crowd. The closest thing I could get to this was making engine noises while I pushed the shopping cart into the next aisle. Even before I could drive, I had my dream car picked out, a 22B Subaru Impreza. You know, the car on Grand Turismo that was bright blue with the yellow rally graphics. Through the years I saved my money and my senior year of high school my dream came true; I bought a 1999 Subaru Impreza. Now this was the closest thing available in America to the 22B. You bet it was bright blue and at one point even covered in bright yellow rally graphics. I loved the car to death and spent pretty much every penny I earned modifying this car.
Time passed, priorities changed, and it ended up sitting the garage collecting dust. That’s when I did it, the unthinkable, I sold it. Now, at the time I thought this was the most practical decision and I didn’t really drive it much. I got married, bought a house, all the things you’re supposed to do as an adult. This was the right things to do, right?
You guessed it, a part of me was missing. My comfort blanket was gone, and I wanted it back. I looked and looked and 14 years later after my first Impreza, I picked up my second Impreza. Join me for this journey as I turn my dreams back into reality!
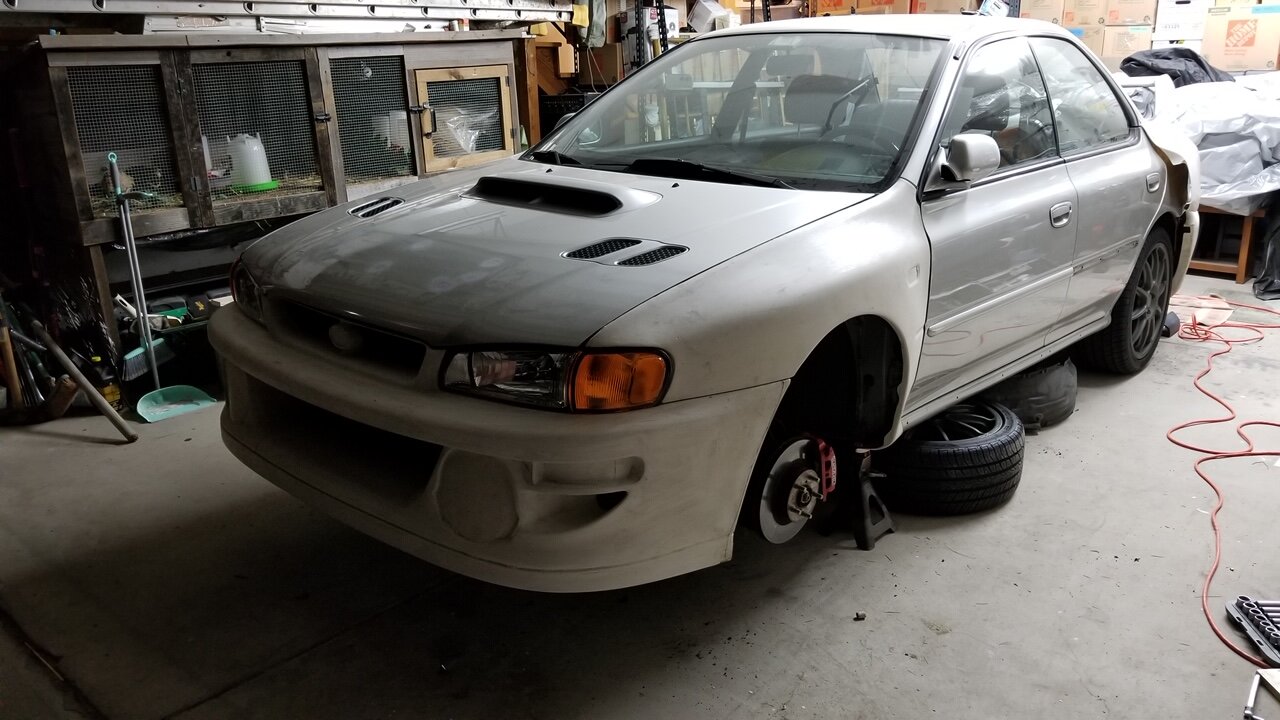
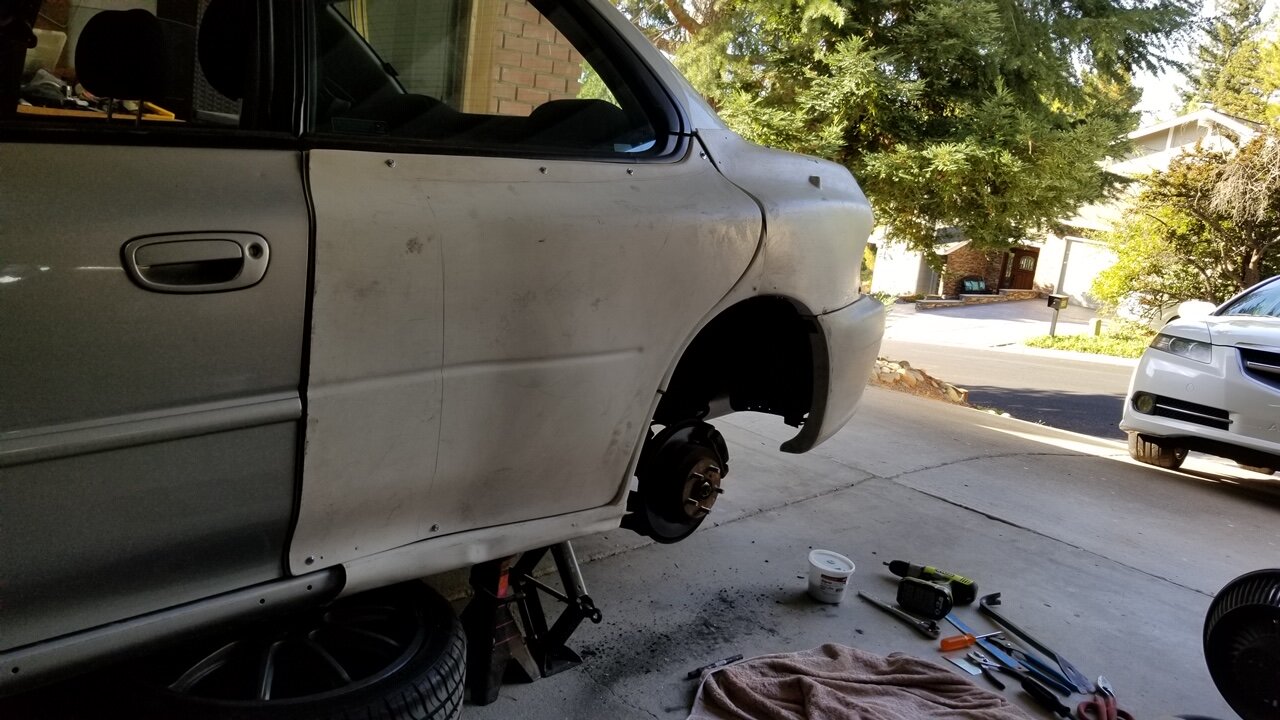
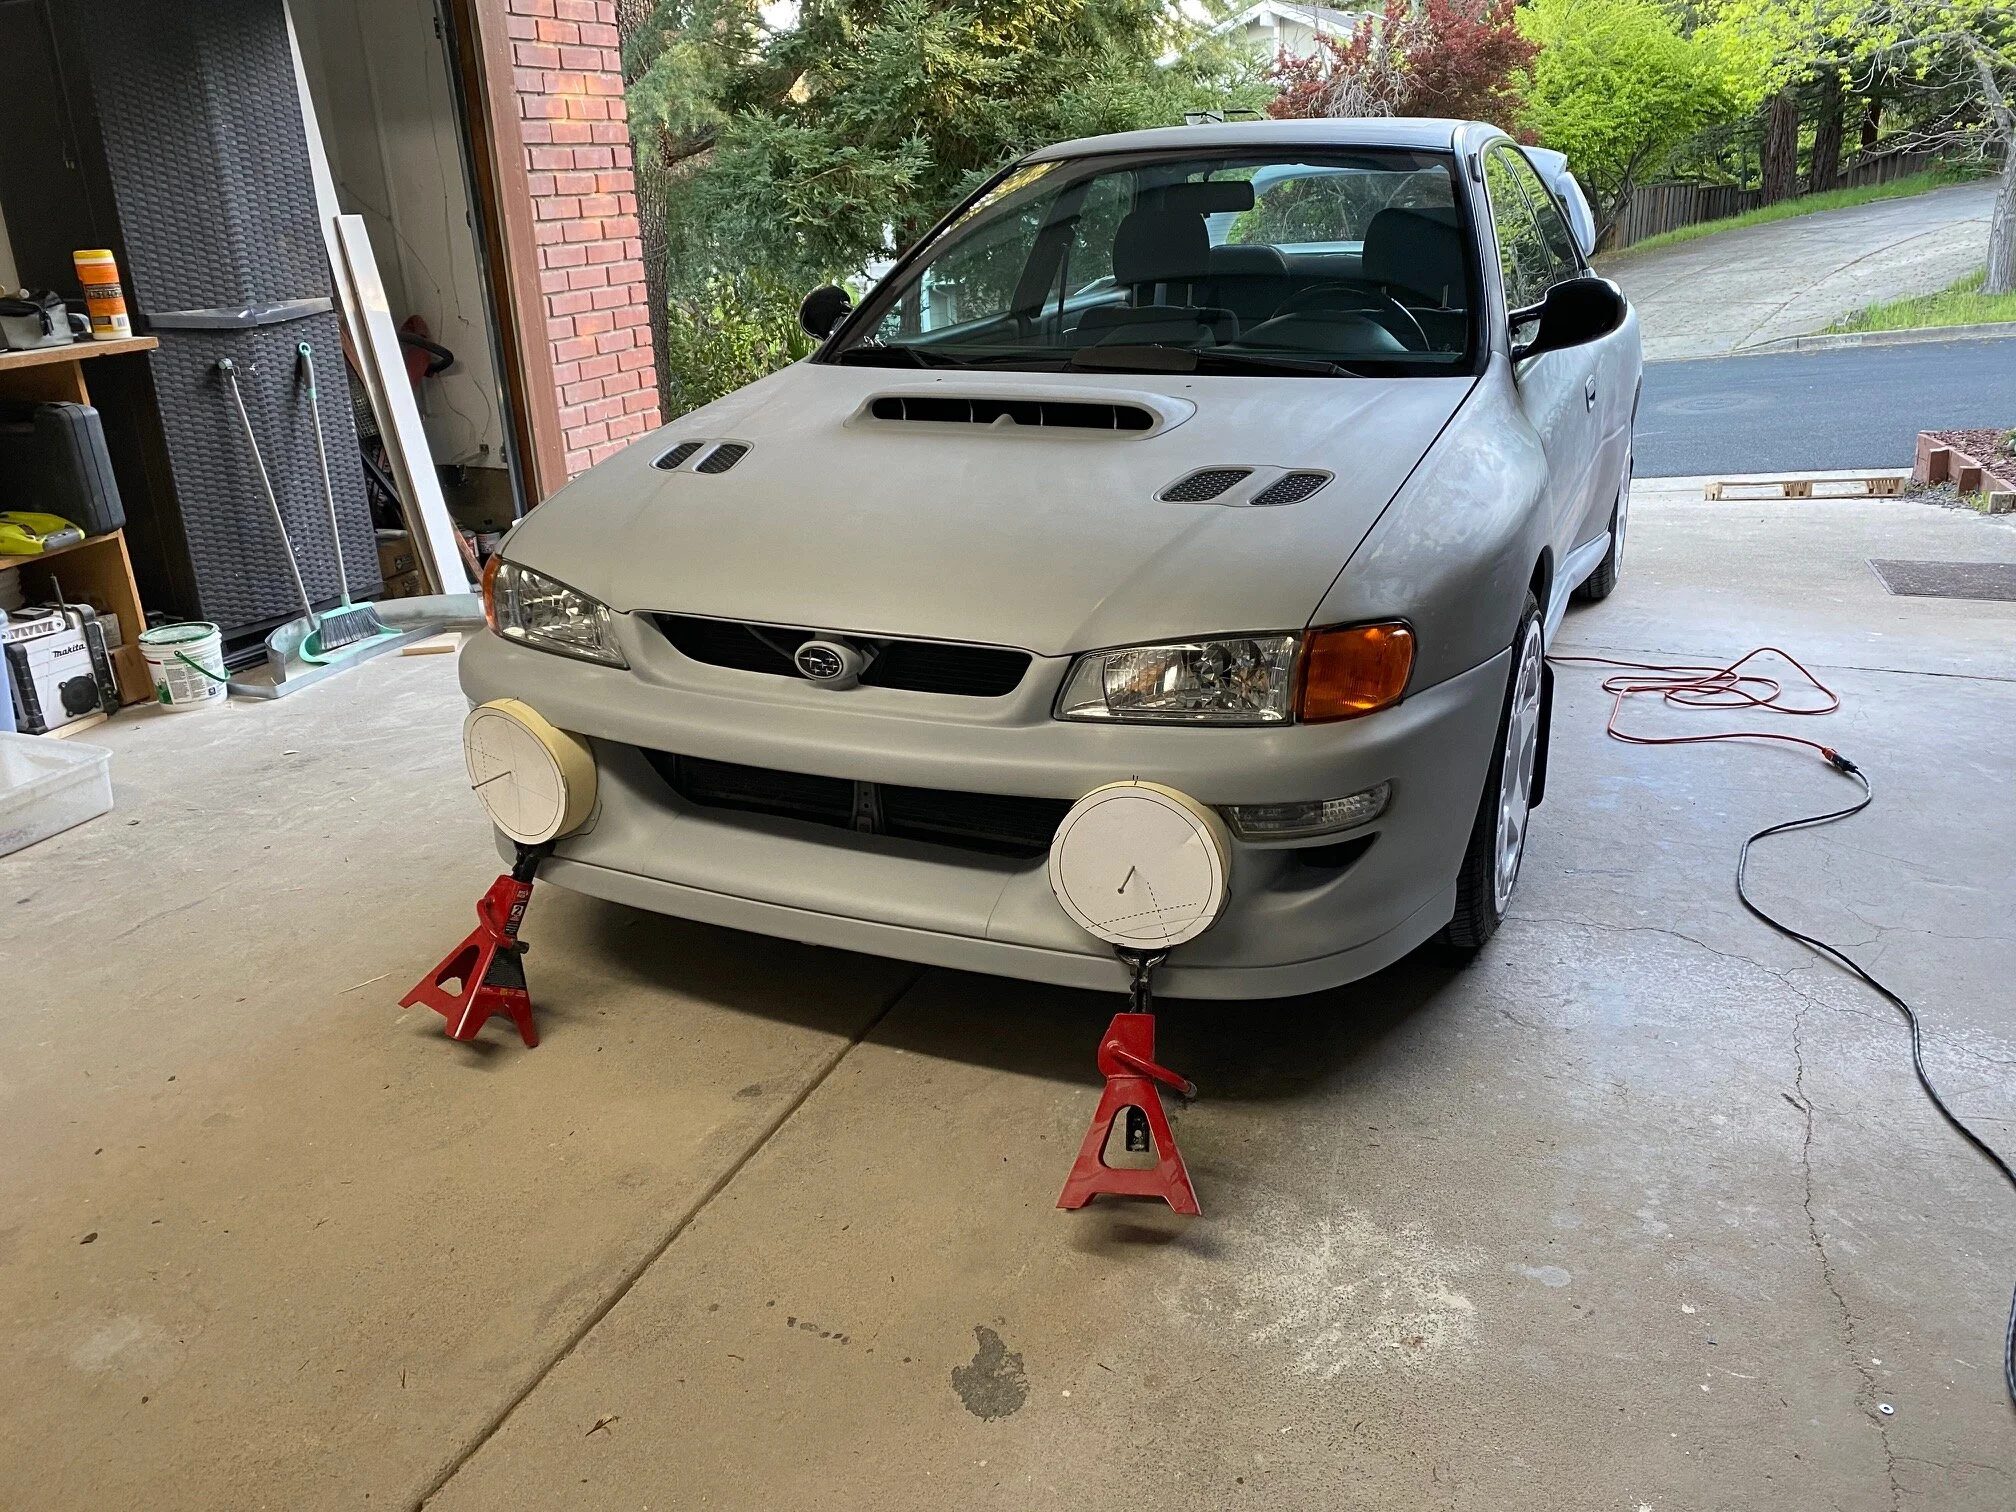
Everything on the exterior body of the car was replaced with new body panels and I custom molded a few elements for the exterior of the car.
Modifications include:
Exterior: 22b 50mm wide body kit , Custom rear spoiler, Custom bumper light pods, Custom Hood Vents, Custom hook light pod, custom brush guard, LED driving and accessory lights ,JDM rear tail lights , JDM amber corner lights , JDM turn signals, Rockblokz front lip, and rally armor mud flaps.
Suspension: DC coil overs, Extended studs , 15mm pass through spacers, Fifteen52 Turbomac wheels, Stoptech cross drilled rotors with Stoptech pads.
Performance: Stromung exhaust, un-equal length performance headers and custom intake.
Interior: JDM WRX front and rear seats, 8” rear deck mounted subwoofer, DVD fold out receiver.
I love being a dad and playing with my daughter. I still feel like a kid a heart. Of course, my family spoils her and she got a Power Wheels Jeep for Christmas. I loved watching her learn to steer, power through brush, and race around our back yard track but it left me wanting more. I wanted to drive with her!
That is when my idea to build an adult sized Power Wheels bubbled up. I thought about buying a go kart but that was much to noisy and messy. I wanted something electric powered that I could drive without angering the neighbors. I looked at electric go Kart kits, but it was too expensive. That is when it hit me, rip apart an old mobility scooter.
Now the ethical part of me could not rip apart a perfectly good scooter so I found a pretty beaten down one on Craigslist. It was a perfect candidate and seen better days. I would rip this apart and use the chassis, battery, and motor for my build. I found two non-running Power Wheels shells to use for the body. A few magical days later I had my custom adult Power Wheels.
I went through a phase in my life were all I could think about was boats. Something about being on the open water and the rocking of the waves. I loved to fish and spent the summers in Lake Washington with Uncle. I lived near Berkeley at the time and would visit the estuary were they had boat building classes. I started to investigate boat building and came across the world of Mini Tugboats.
I knew nothing about boat building but thought this would be a perfect project. I spend months researching plans and materials and 3 months later I had my own mini tugboat. The boat was made from 1/4 “ Marine grade plywood stitched together. Two layers of fiberglass cloth protected the exterior hull of the boat and ensured a watertight seal. The rest of the boat was made from pine and sealed with resin.
The total boat length was just a hair under 8 ft long and could fit 2 small adults. It was powered by an electric trolling motor and 12V battery. The top half could be removed, and the main hull could be flipped upside down and transported on my roof rack.
Sadly, the end of its life was pretty sad. It was leaning against a fence when a windstorm came. The fence blew over and the boat fell, filled with water, and slide 50 ft down a hill were the hull cracked from the impact and being full of water. I say it “Reverse sank”. Unfortunately, the damage we un-repairable and the mini tugboat is no longer with us.
I loved visiting the Monterey Bay Aquarium and the Academy of Science since I was a young. I worked at the East Bay Regional Park maintaining the Aquariums at Crab Cove fresh out of college and now as an adult, I wanted to bring this enjoyment back home. There was a blank wall in my garage office, and I got the “OK” from the Boss/ aka wife I could build a wall tank.
Thankfully the wall I chose is not a structural wall making it very easy to cut a hole, brace the framing, and finish it back up.
It started off with a 150 gallon used fish tank. It was in pretty bad condition but a few hours with a 2 stage polishing compound brought it back to new.
I built a 3D back drop from carved insulation foam and land masses from rocks and pond expanding foam. The filter system is located behind the rock wall and feeds a waterfall on the left side.
We do not really have any trees in our backyard, but this is close enough. The time came to build my daughter a club house. I could remember countless summer days as a kid building forts in the back yard and wanted to share this joy with my daughter.
The kid in me wanted to build this for myself as much as for my daughter but hey, it is a win for everyone!
I wanted to build a custom lip for my car and there wasn’t anything on the market that I liked. Inspired by the Japanese “bozozuku" style cars I wanted something a little more outlandish but still tasteful. I wanted something that stood out but still derivable.
I started off with a metal and wood pattern and used expanding foam to create shape. I shaved the foam with a saw blade and sanded it to shape with 80 grit sandpaper. I kinda cheated here. I knew there would be a lot of surfacing ahead of me so I used painters tape as a mold release surface. Ready to lay the first layer of fiberglass.
The fiberglass is laid over and the surfacing begins. I used a sandable gel coat and lots of primer. You can see the black guide coat sprayed on to show the low spots after sanding. Final surfacing and I painted this front lip with automotive color matched paint and a two stage clear coat.
If you are builder like me there is nothing better than throwing over sized items on your roof. Something just feels so right about it. My stock roof rack was not cutting it and after an incident with wood falling off the top of my car it was time for an upgrade.
After searching the internet and concluded, I would have to spend close to $1800 for an ungraded rack that would do what I wanted. It would need to cover the entirety of my roof and be strong enough to hold a a few hundred pounds of wood. It was time to build a new rack.
After a bit of brain storming and a trip to the hardware store I figured it out. I picked up some angle iron, Uni-strut, and some miscellaneous hardware. I would like to dedicate this build to my $12.99 Harbor Freight angle grinder.
The total build cost around $250 all in. I used uni-strut for the main frame, an old aluminum army cot for the light tube frame, and a discarded “no trespassing”, sign for the aluminum stock to attach the light mount to the rack.
I wanted to build an RC truck from the ground up. After watching Jurassic world I was inspired to build a Unimog RC car. The entire body was made from 1/4” MDF wood and sealed with paint. I build the chassis from 1/8” aluminim.
We have a really long mirror in our master bathroom and for some odd reason the longest light fixture you can get from local hardware stores max out around 36-40” and we needed something longer. You could special order a light but prices started around $500 and that was too rich for my blood.
In came my new found skill for copper pipe soldering. I drew up some plans and had a good idea of what I wanted to create. I wanted an industrial look with a touch of farm house. I sourced some light socket kits from Homedepot, 6” metal mixing bowls, copper pipe, and a torch. Let the soldering begin!
I learned a few good lessons building this light housing. First, copper pipes can get extremely hot and secondly you can’t flip a propane torch upside down while it is on. It does not like it. All in all I spend about $55 for this build and most importantly the wife loved it!
I wanted to start some more budget friendly home improvements projects and what better place to start than the fireplace. The current fireplace was in good condition but just was not the look we wanted. It looked dated and really stood out in the family room. It was time for a change.
I started with tearing off the current mantel and started framing in the new mantel with pine planks and base board flipped upside down. My wife wanted to white wash the brick, this part was pretty scary because I haven’t done this before. I felt like this is the step things could go very wrong. I simply watered down some flat wall paint and brushed it on. You can dab the brick to give more or a texture and depth. To my surprised it turned out great!
I wanted to find a way to add closet space without sacrificing removing a room or having to add on to the house. I had the idea of simply expanding our current closet out, adding 25 sqft of additional closet space. The closet was located in an unused corner of the room and is designed with a 45 degree entry making the closest almost un-noticeable when entering the room.
If you can believe it, I found free doors, just needed some fresh paint and hardware. I also had to pick up a handful of studs, a few sheets of dray wall, finishing materials, and paint totaling the cost of this project to around $300.
I am a doodler, as far as I can remember and I drew on everything. Even now as an adult during work meetings I still find myself doodling and most of the time it is cars.
It all started in college, I had to take a bunch of Art History Classes. If you haven’t taken one of these classes I strongly recommend you reconsider unless you have an appetite for classic art and endless outdates slides. My teacher tried his best to make it interesting but there is only so much you can do. So you guessed it, I drew cars on my class notes. I was a huge fan of Japanese pop art and got into drawing “Chibi” style cars. Seeing I was a broke college student this was the closest I could get to owning them.
20 years later I finally decided to take my art to the masses and started “Toon” Your Ride. I take people’s cars and turn them into custom “Chibi” style cartoons. Enjoy a sampling of my work or visit @Toon_Your_Ride on Instagram.
I used to have pet frogs back in high school and recently my interest was re-ignited after talking to an old friend about how fun it use to be. We decided to order bulk and I had to design a cage that could hold multiple frogs. They type of frogs I wanted to get couldn’t not be housed in the same area because they will try to eat each other.
Each cage section is built from a single 20L fish tank with 3 glass dividers, evenly splitting each cage into 4 chambers. Two radiant floor heaters are placed under each cage to evenly head the chambers to 75-85 degrees. I had a total of 12 frogs in three divided tanks.
Most of my frogs are African bull frogs or commonly known as “pixie” frogs. These frogs get huge, like dinner plate huge, and I feed them crickets, hornworms, roaches, and meal worms every day.